
In this article, we will guide you on initiating the acceptance of cryptocurrency as payment on your Opencart website through the Bcon Global payment gateway. The key advantage of this gateway lies in its non-custodial nature, ensuring that funds are deposited directly into your wallet. In simpler terms, the money goes straight to you rather than being routed through the service’s accounts. You can either use our ready-made OpenCart plugin for a quick setup or build a custom integration using our crypto payment API to fully control how payments are processed on your website. (Refer to our other article for more details.)
For those who prefer not to read, there’s an option to watch the video.
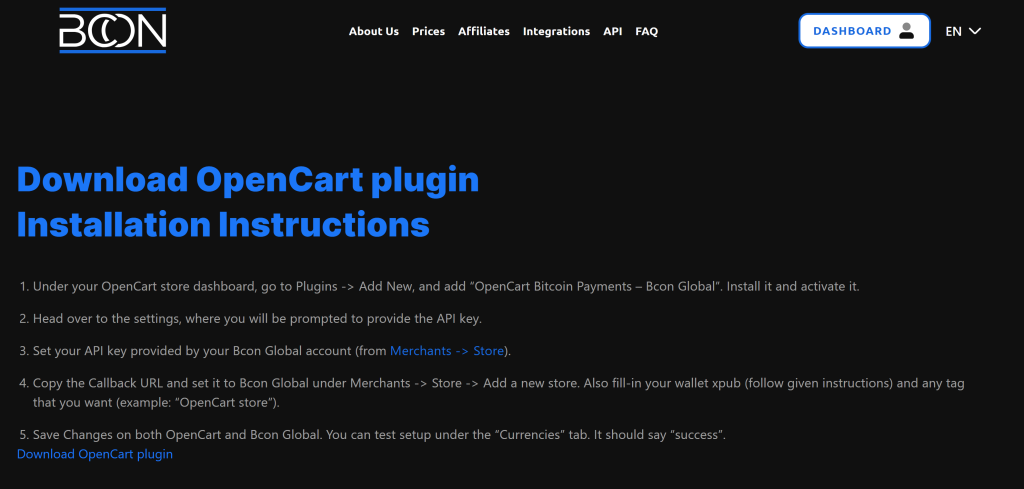
Step 1. Download the OpenCart plugin
Begin by downloading the Opencart plugin directly from our website. You can use the provided link, or alternatively, navigate manually to the “Integrations – Plugins for eCommerce – Opencart” section.
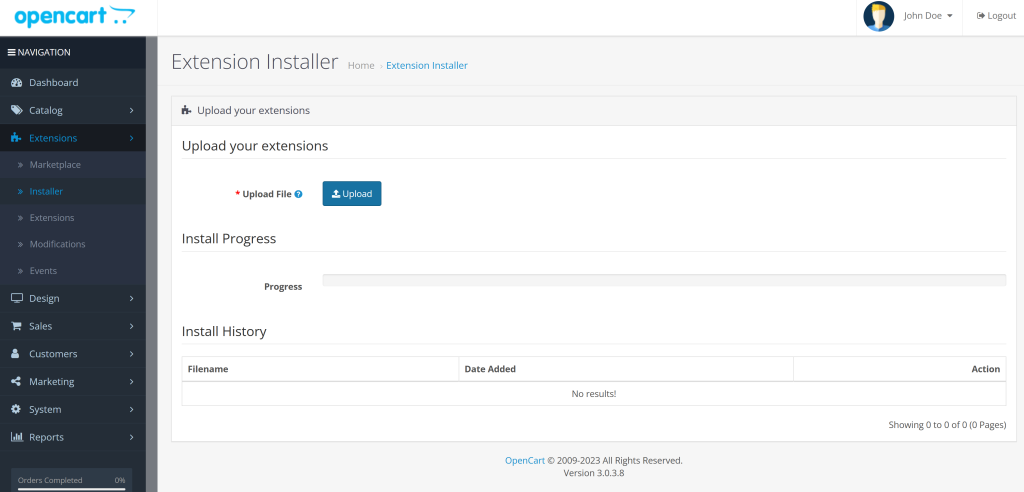
Step 2: Plugin Installation on Your Site
Navigate to the “Extensions – Installer” section within your administrative panel. Access the downloaded “.zip” file (do not unzip it) by utilizing the “Upload” button.
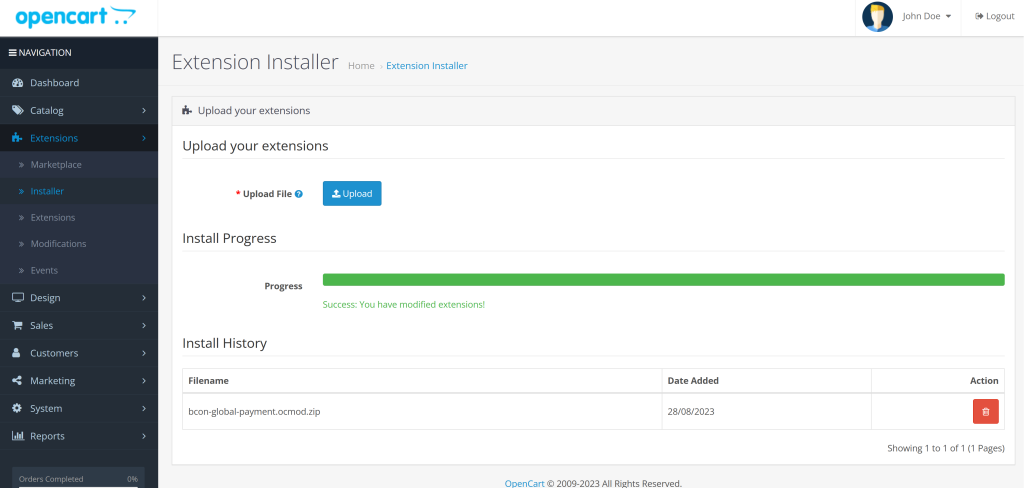
If everything is proceeding smoothly, you should observe something similar to the following.
Step 3: Configure the Extension
Proceed to configure the extension by clicking on the “Extensions” tab. In the drop-down menu, select “Payments”. Once the page loads, scroll down to locate “BconGlobal” (alphabetically listed). Click on the green “install” button. After installation, click the blue edit button to proceed to the next step! To finalize your payment setup, ensure you are accepting crypto payments using API. This method provides a seamless transaction experience for your customers and enhances security during payments. After verifying the configuration, test the integration to confirm everything is functioning properly. Additionally, you will want to consider accepting Bitcoin payments on WordPress to expand your payment options further. This approach not only attracts a broader audience but also aligns your business with current financial trends. Be sure to keep your plugins updated to support the latest features and security enhancements related to cryptocurrency transactions.

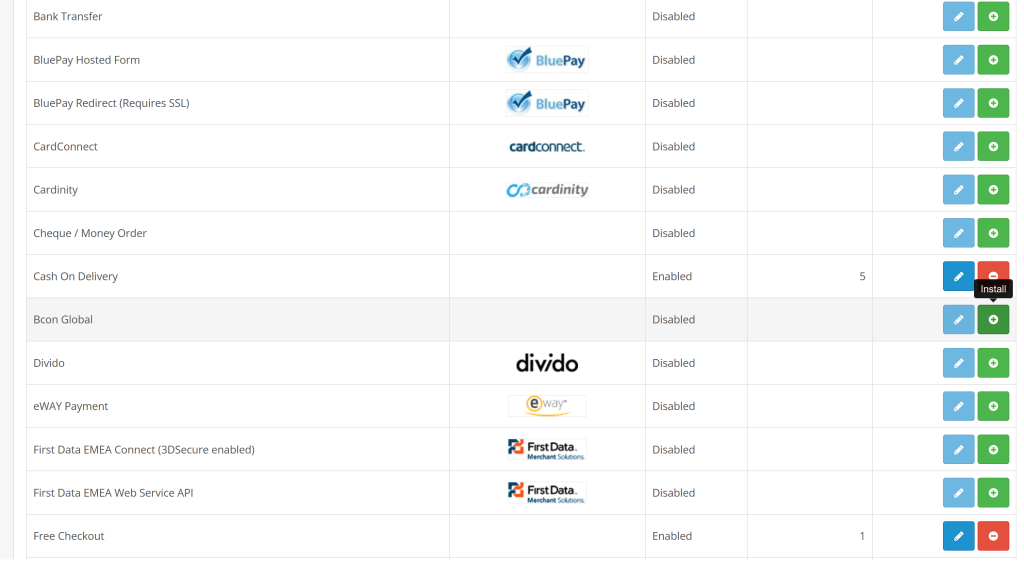
Provide information regarding your linked “Bcon Global’s store” from the next step.
Step 4. Connecting ( Creating) your store in the Bcon Global
Create a “Store” in your Bcon Global account and then copy the “API key” and “callback link” to fill in the corresponding fields within the settings of the OpenCart plugin.
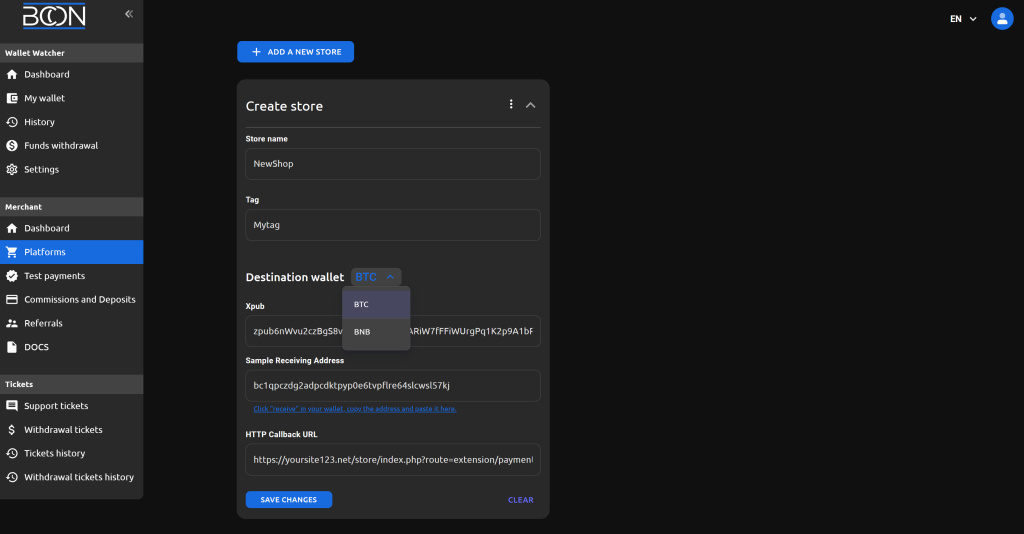
Store Name: This will be displayed in the “Payment History”, allowing you to identify the site for which the transaction was conducted.
Tag: Additional information or notes, at your discretion.
BTC / BNB Dropdown List: In each dropdown, you need to input your wallet details to receive cryptocurrency from your clients. It’s not necessary to fill out both blockchain pages. If you only want to accept BTC, fill in the details for the BTC wallet and leave the BNB section empty. For BTC, provide the public key along with one of the wallets generated by this key to verify the accuracy of the entered public key. For BNB, simply specify your wallet.
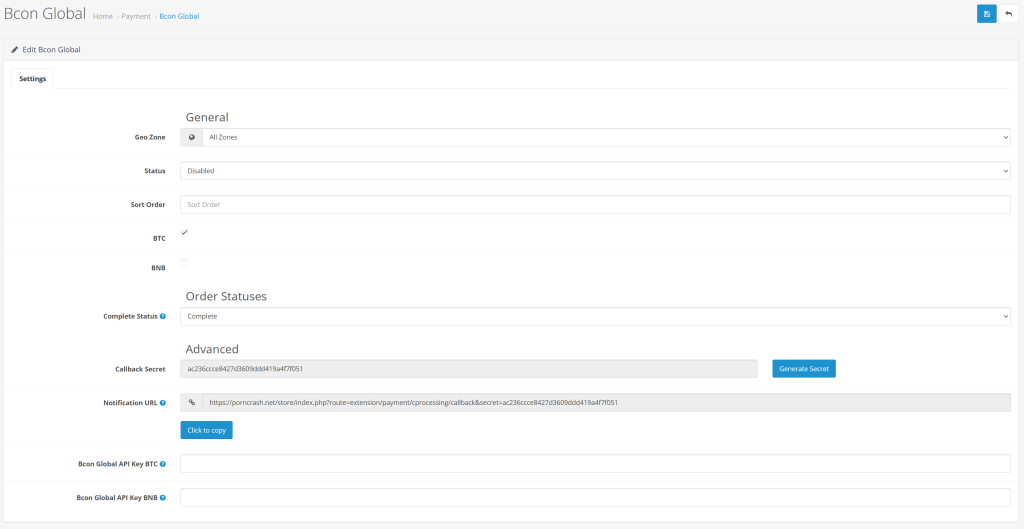
API Key: As shown in the screenshot above, API keys are not issued during Store creation. Therefore, you must initially create a Store by linking wallets. Afterward, revisit it and copy the API keys.
Callback URL: Retrieve this from the ‘Notification URL’ the link supplied by the plugin.

Adjust the plugin status to ‘Enabled’ and ensure to select the checkboxes corresponding to the currencies you intend to utilize. In this instance (as depicted in the screenshot), BTC and BNB. Input the API keys (copy them from the generated Store) for the desired currencies.

Check the wallets that will be visible during the purchase.
The wallet associated with this invoice was generated using the public key specified during the store setup process. Consequently, users have the capability to make direct payments to your wallet. This enables you to receive cryptocurrency directly into your wallets without any third party! To ensure you can smoothly manage these transactions, it’s beneficial to utilize cryptocurrency tracking techniques and tools. These resources allow you to monitor incoming payments and assess the value of your holdings over time. Additionally, they provide insights into market fluctuations, helping you make informed decisions about your investments.
How it looks for BTC:

How it looks for BNB:

Join our community and enjoy the full advantages of a non-custodial cryptocurrency gateway!